Whether you’re a tech-savvy sparky or more used to old-school methods, Groundplan offers features that can save you hours each week with online takeoffs
Whether you need a polished, easy-to-read plan with clear labels for cables, GPOs, conduits, or switches, or you're looking for ways to save time on takeoffs and estimates, Groundplan’s got you covered.
Let’s explore three Groundplan features that save you time with online takeoffs.
1. Takeoff Templates
Groundplan’s Takeoff Templates let you save and reuse material lists and measurements.
Often, electrical businesses use the same list of materials for residential jobs or the same list of materials for commercial jobs. In other words, you may compile a specific list for jobs or materials of a certain category. This is where Takeoff Templates become invaluable.
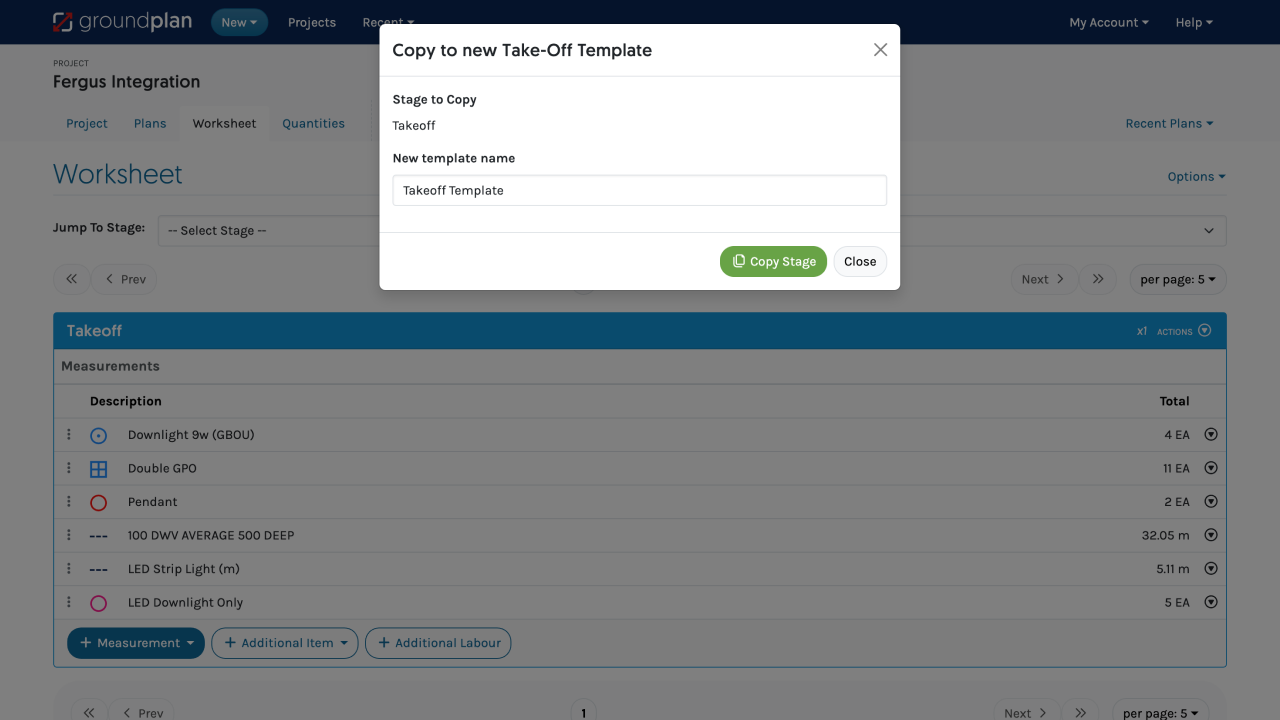
How to Create a Takeoff Template from an existing Stage
1. Go to the Worksheet tab.
2. Click Actions and select Copy to New Template.
3. Rename your template and click Copy Stage.
4. To add new measurements, click +Measurement and choose Count, Length, or Area.
How to build a Takeoff Template from scratch
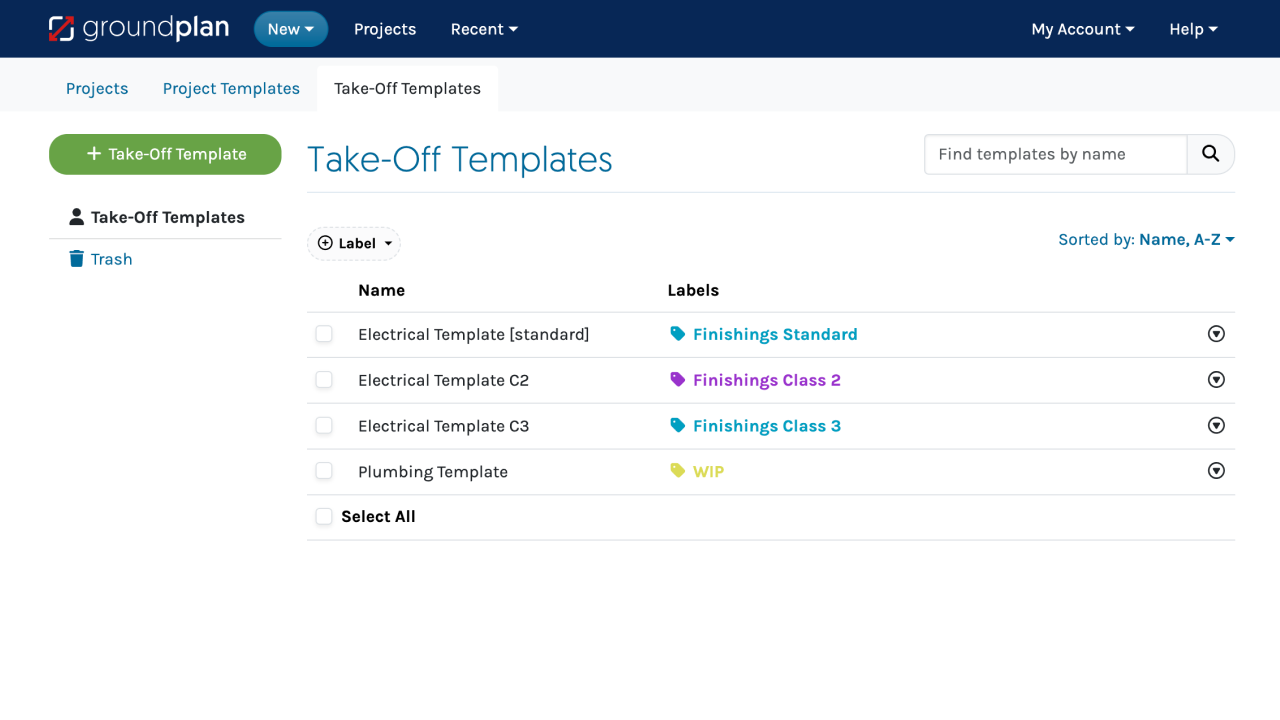
1. From the Home page, click on the Takeoff Templates tab
2. Click +Takeoff Template
3. Name your template and click Create
4. Click +Measurement and select the type (Count, Length, or Area)
5. Complete the measurement details, and if you need to add Parts or Labour, click Create & Add More Parts
2. Project Templates
Project Templates are ideal for electrical businesses that follow a similar process for all or some of their projects.
For example: For an electrical business contracted by a restaurant chain, Project Templates are an ideal way to apply the same setup for multiple locations, including your Stages, To-Do Lists and more.
In fact, anywhere you apply the same process to a project, Project Templates are invaluable. Set up your project once and reuse it across multiple jobs, saving time on setup so you can focus on the important stuff right away.
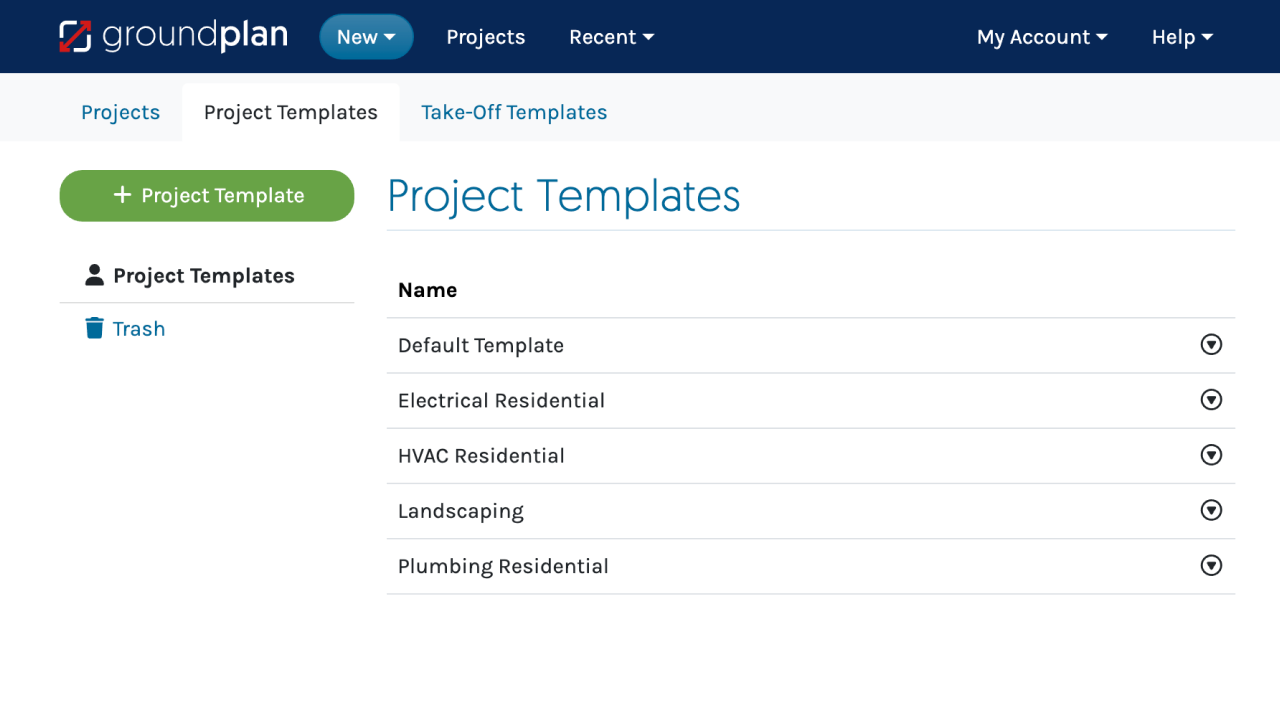
Creating a new Project Template
1. Go to the Project Templates tab
2. Click +Project Template
3. Enter a name for your template and click Create
Include Takeoff Templates within your Project Template
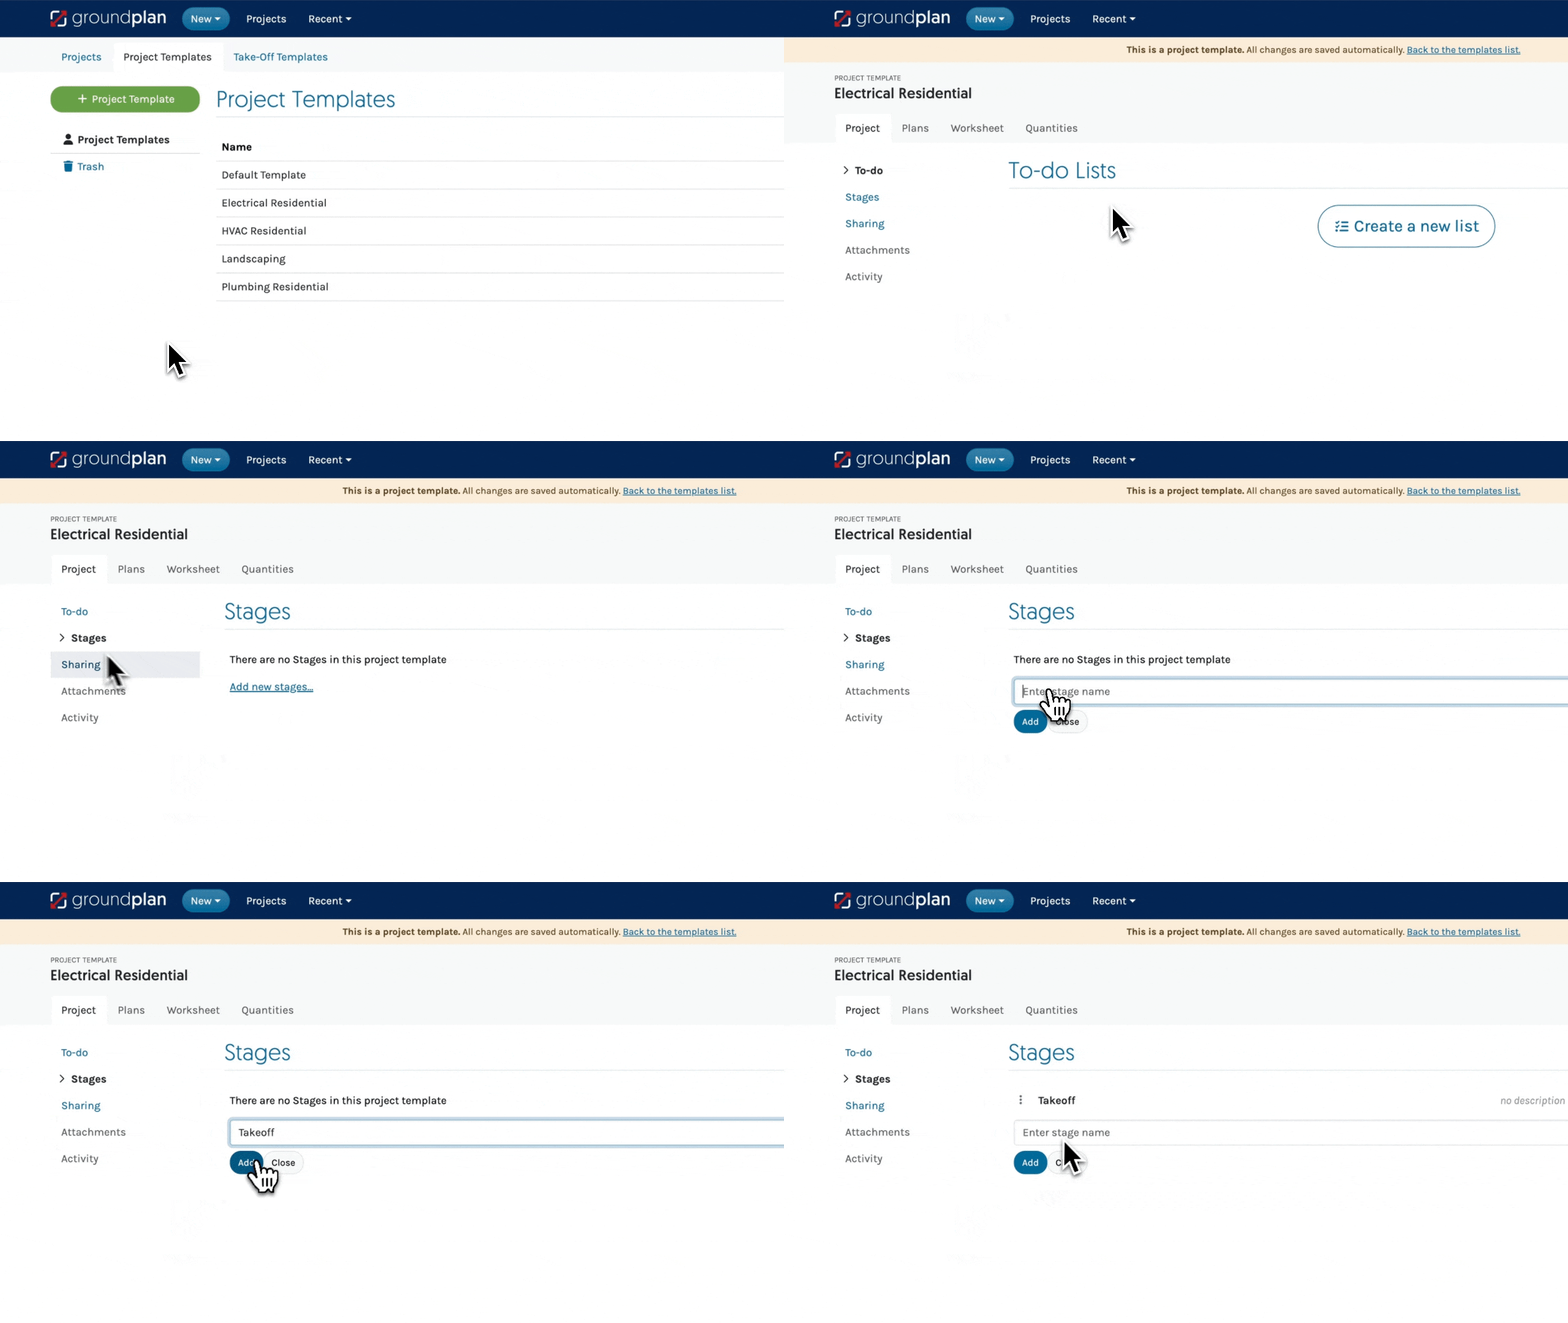
Create Stages for your project and link them to Takeoff Templates.
When you load a new project based on a Project Template, the Takeoff Template will appear already linked as a Stage in the new project.
1. In Stages, click add New Stage
2. Enter the stage name and click Add
3. (Optional) Click on the stage name to add a description or link an existing Takeoff Template
4. Click Save when done
Create a new Project based on your Template
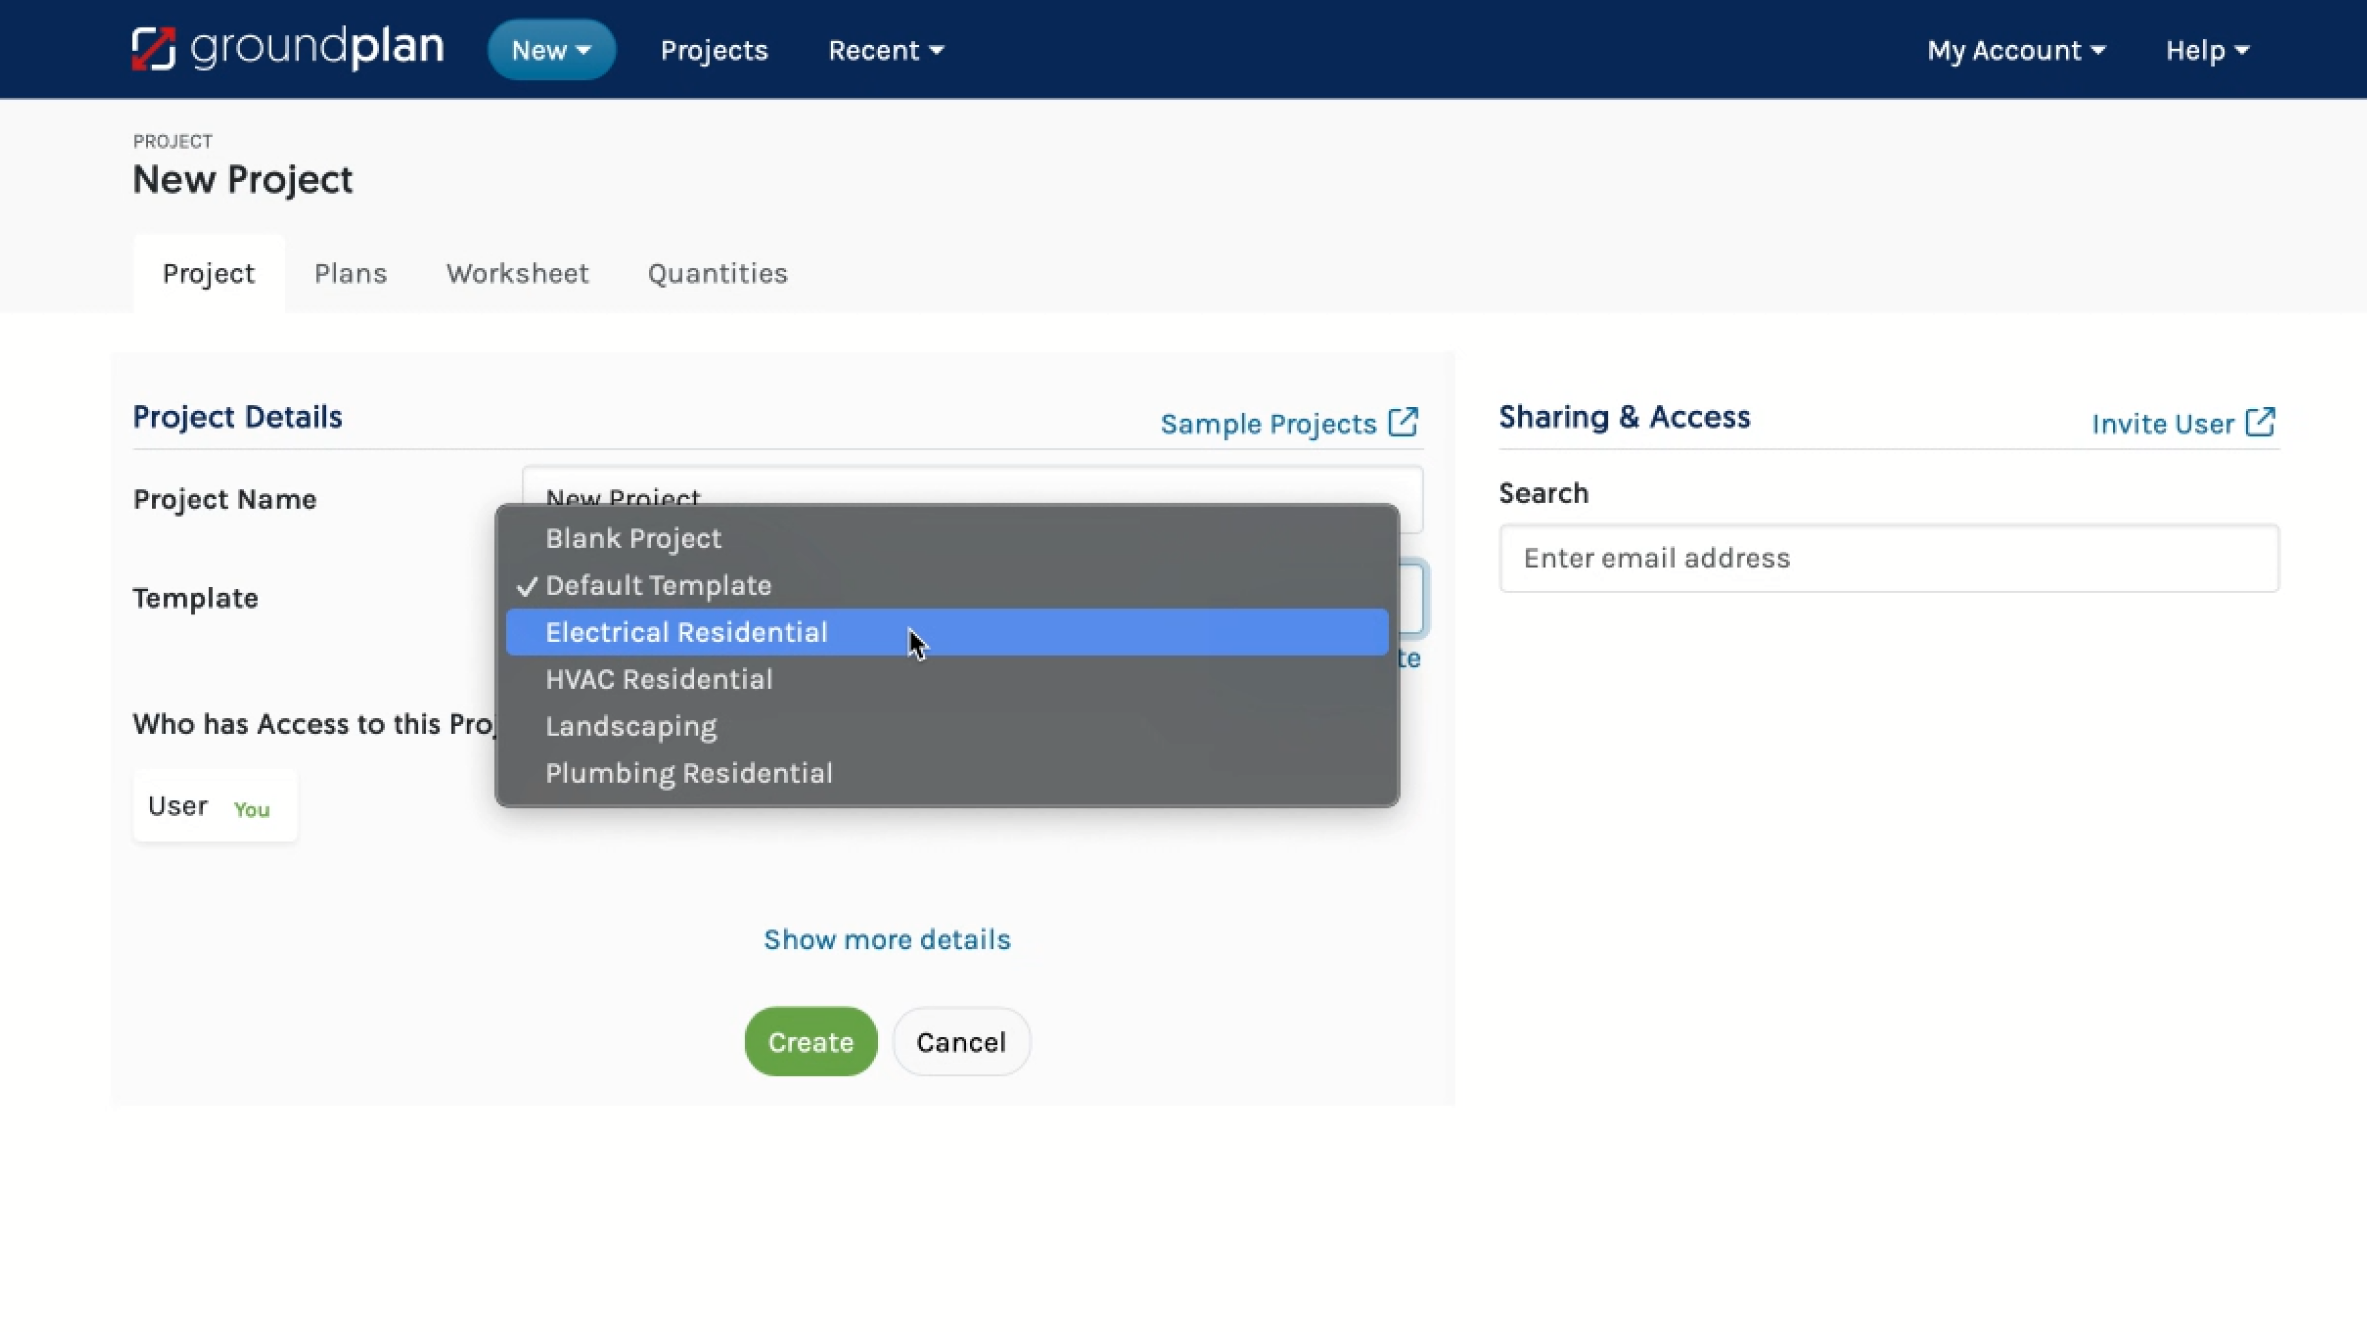
When creating a new project, simply select your Project Template from the drop-down list. This will automatically apply all your pre-set To-Do Lists, Stages, Takeoff Templates, and Sharing settings to the new project.
3. Count Labelling
Clear, consistent labels make your plans easier to read and simpler to present—whether you're labelling cables, GPOs, conduits, or switches. That’s where Count Labelling shines. Your labels are added automatically for each count rather than adding them manually.
For example, a sparky might use Count Labelling to indicate the height of data points in an electrical design or to display the order of installation for specific components. It’s also handy for referencing items if changes are needed or to show which circuits power points or light points are connected to.
Here’s how it works:
Adding labels to new Counts
1. From the Stage, select a Count Measurement
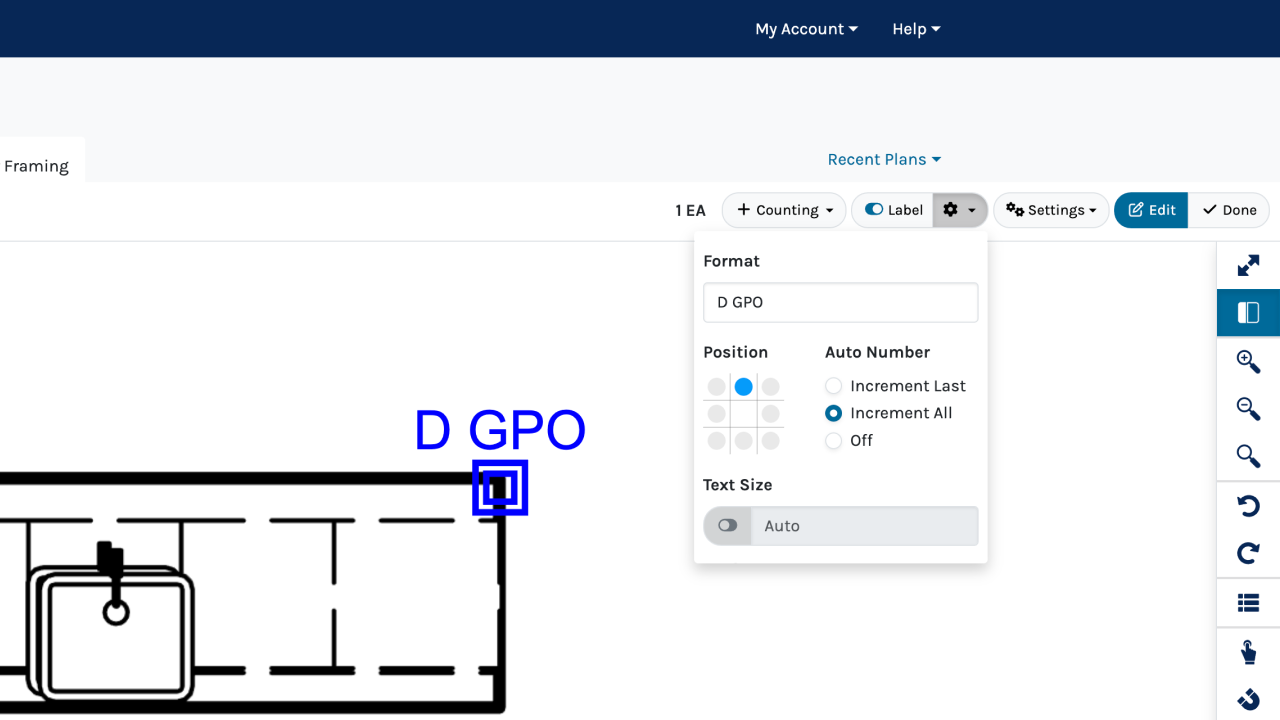
2. Click Label Settings
3. Enter a Label Format (you can include prefixes, suffixes, and special characters)
4. Choose Formatting Options, such as Auto Number
5. Move the cursor away from the window to see the updated appearance
6. Place the Count on the Plan by clicking where you want it
Adding labels to existing counts
You can add or edit labels on existing Counts, including those created using Count Assist.
1. Click on the Count (For Count Assist users, switch to Manual Count Mode)
2. Click Label Settings
3. Enter the Label Format or select Continue from x to pick up from the last sequence
4. Choose your Formatting Options
5. Move the cursor off the window to preview the changes
6. Click Counting and Labelling
7. Start outside the Symbol, then click, hold, and drag over the symbols in the order you want to label them. A green line will appear, showing the order
Learn more about count labelling here.
Groundplan’s features and design tools help sparkies save time on online takeoffs and create flawless, branded electrical layouts. It doesn’t just eliminate the grunt work—it ensures you deliver clean, professional plans to your clients, leaving a lasting impression.


